We will add three buttons that can be used for redlining within the map.
Before we start with the redlining we need an additional layer inside of the map.
An instance of the class OpenLayers.Layer.Vector can be used for this purpose.
Tasks
Note
We’ll asume in the following snippets that the newly created vector is named redliningLayer
Our button for redlining points shall manage an instance of OpenLayers.Control.DrawFeature. First we should create such a feature drawing control working on our layer and create point-geometries:
// Create the DrawFeature control (Point)
var ctrlDrawPoint = new OpenLayers.Control.DrawFeature(
    redliningLayer,
    OpenLayers.Handler.Point
);
Then we need another GXM buton that is associated to this control:
var btnDigPoint = Ext.create('GXM.Button', {
    olControl : ctrlDrawPoint,
    olMap : gxmMap.getMap(),
    text : 'Pt.'
});
When this button is added to the toolbar you can test whether everythings works. Just draw some points on the map after you have activated the control.
Note
To vertically align the buttons in your toolbar try adding an object {xtype : 'spacer'} between the zoom-buttons and the redlining ones.
Tasks
The buttons to digitize linestrings and polygons can be created accordingly.
Tasks
If all went well you application should look like this...
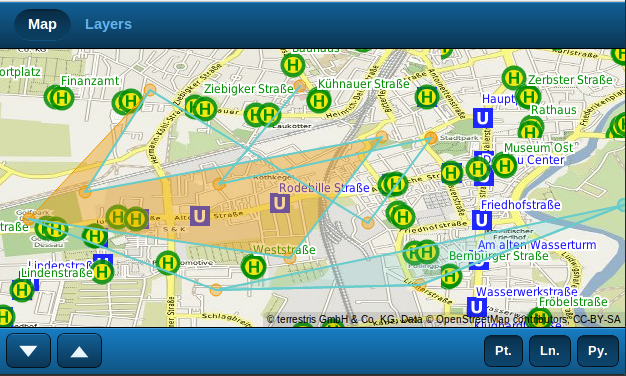
Redlining buttons added but not fully working as expected
... but it is not finished!
As you might have noticed, the redlining buttons all worked, but go confused when more of them got activated. This is because they all work on the same map and therefore should be intelligent enough to deactivate other controls/butons when their actions would otherwise result in errors.
With a combination of the configuration property exclusiveGroup and an additional wrapping Ext.SegmentedButton this can be accomplished.
First we’ll add the property exclusiveGroup to all redlining buttons:
btnDigPoint = Ext.create('GXM.Button', {
    olControl : ctrlDrawPoint,
    olMap : gxmMap.getMap(),
    exclusiveGroup : 'redlining',
    text : 'Pt.'
});

// change the other buttons accordingly
This alone itself is enough to not confuse the map or its controls anymore, but the buttons do not visually hint that they belong to each other. If we put the GXM buttons into an Ext.SegmentedButton-instance, this’ll change:
var redliningBtns = Ext.create( 'Ext.SegmentedButton', {
   items: [
        btnDigPoint,
        btnDigLine,
        btnDigPoly
   ]
});

var mapTb = Ext.create('Ext.Toolbar', {
    docked: 'bottom',
    items: [
        btnZoomIn,
        btnZoomOut,
        {xtype : 'spacer'},
        redliningBtns // only add the segemented button
    ]
});
Tasks
If all went well you application should look like this
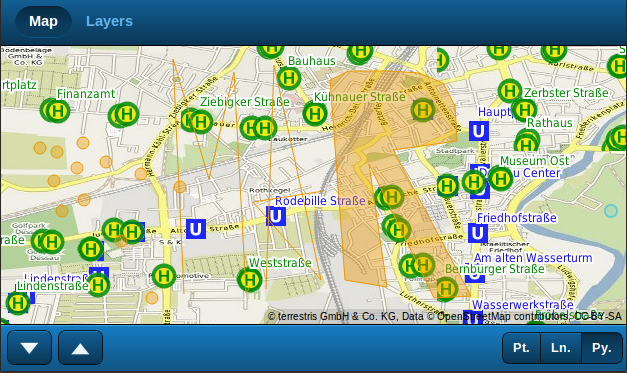
Redlining buttons in a group with only one button active at a time
In the next section we’ll add a geolocation control and a button managing that control to get your current geographic position displayed on the map.

